Panisse (Chickpea Fries)
Get ready to discover the crispy, golden secret that’s been hiding in French coastal kitchens for centuries!
Panisse are basically chickpea fries that’ll make you forget all about regular potato fries – and trust me, that’s saying something.
These beauties start as a silky, creamy chickpea batter that transforms into firm, sliceable perfection before getting their final golden makeover in hot olive oil.
The result?
Crispy exteriors that give way to tender, almost custard-like centers with a nutty, satisfying flavor that’s completely addictive.
What makes panisse absolutely irresistible is their incredible versatility and that satisfying contrast of textures.
Picture this: you bite through that perfectly crispy, golden crust and hit the creamy, almost polenta-like interior that melts on your tongue.
The chickpea flour brings this amazing nutty depth that’s both comforting and sophisticated at the same time.
Plus, they’re naturally gluten-free and packed with plant-based protein, so you can feel good about devouring them by the handful.
Whether you’re serving them as an elegant appetizer with harissa mayo or just snacking on them straight from the pan, these little golden beauties are about to become your new obsession.
Ingredients
For the Panisse Base
- 4 cups water
- 2 cups chickpea flour (garbanzo bean flour)
- 1 teaspoon kosher salt, plus more as needed
- Olive oil for coating the pan
For Frying
- 1 1/2 cups olive oil
Optional Garnishes
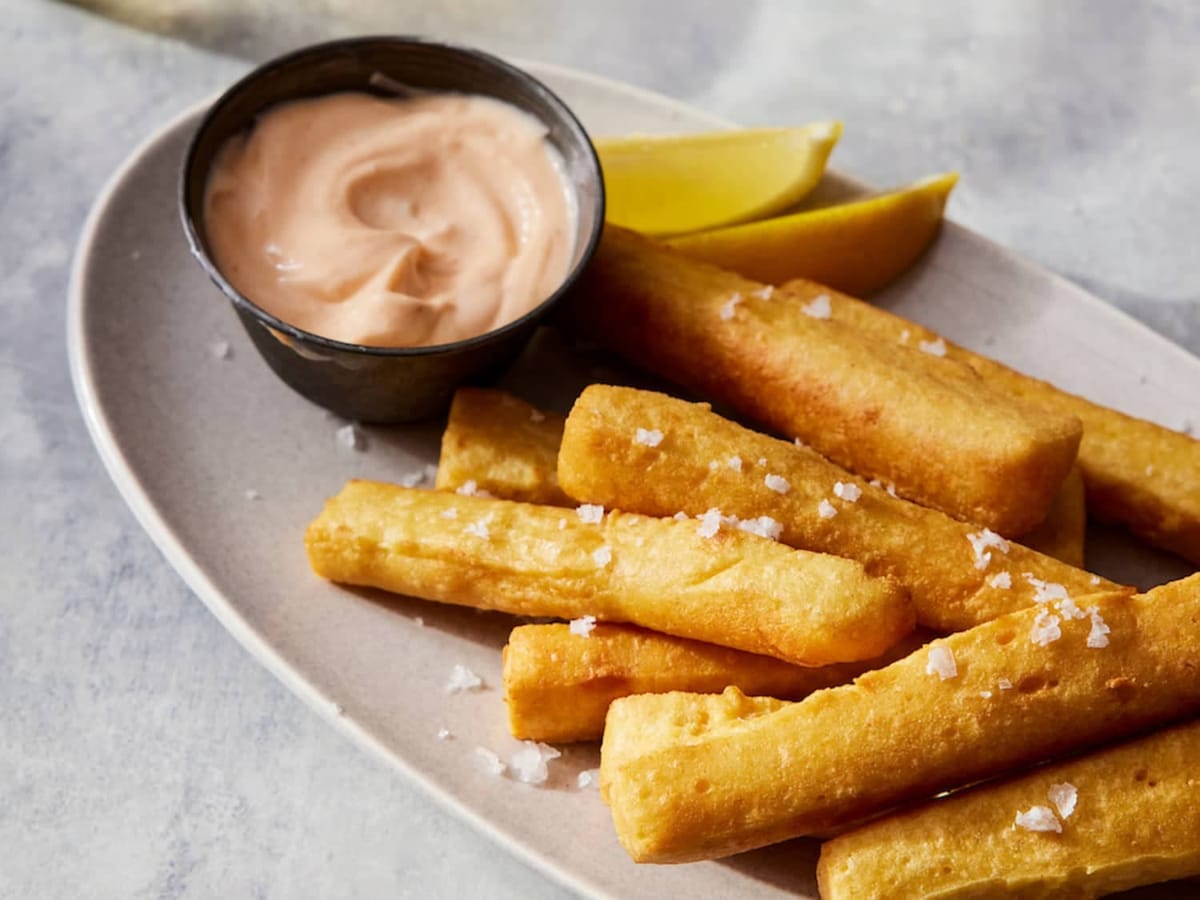
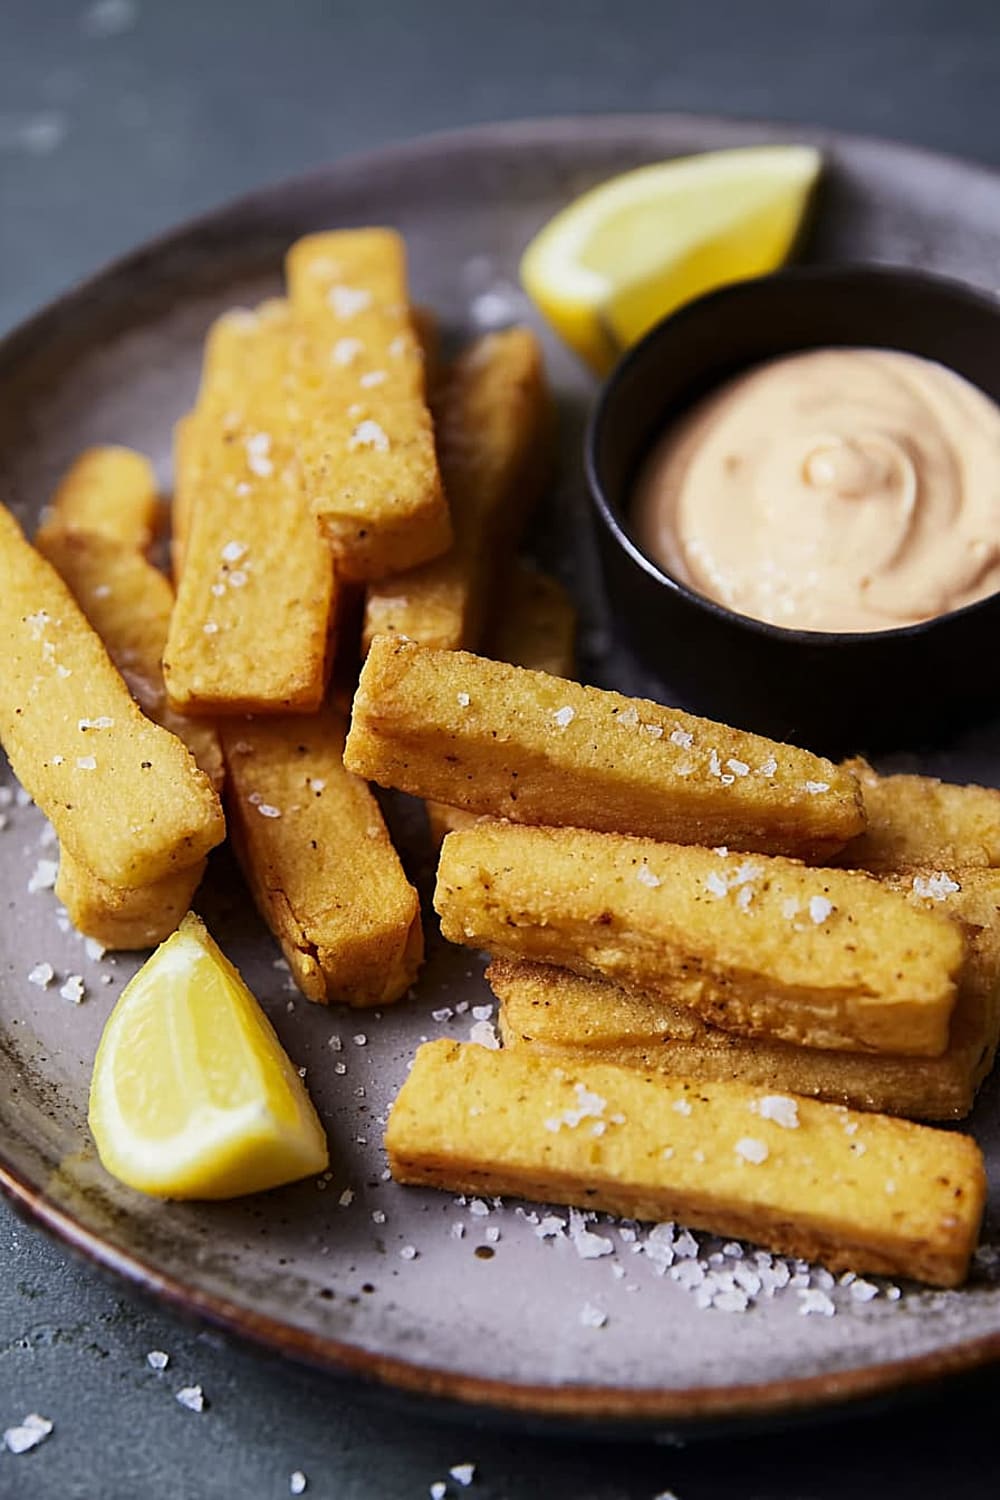
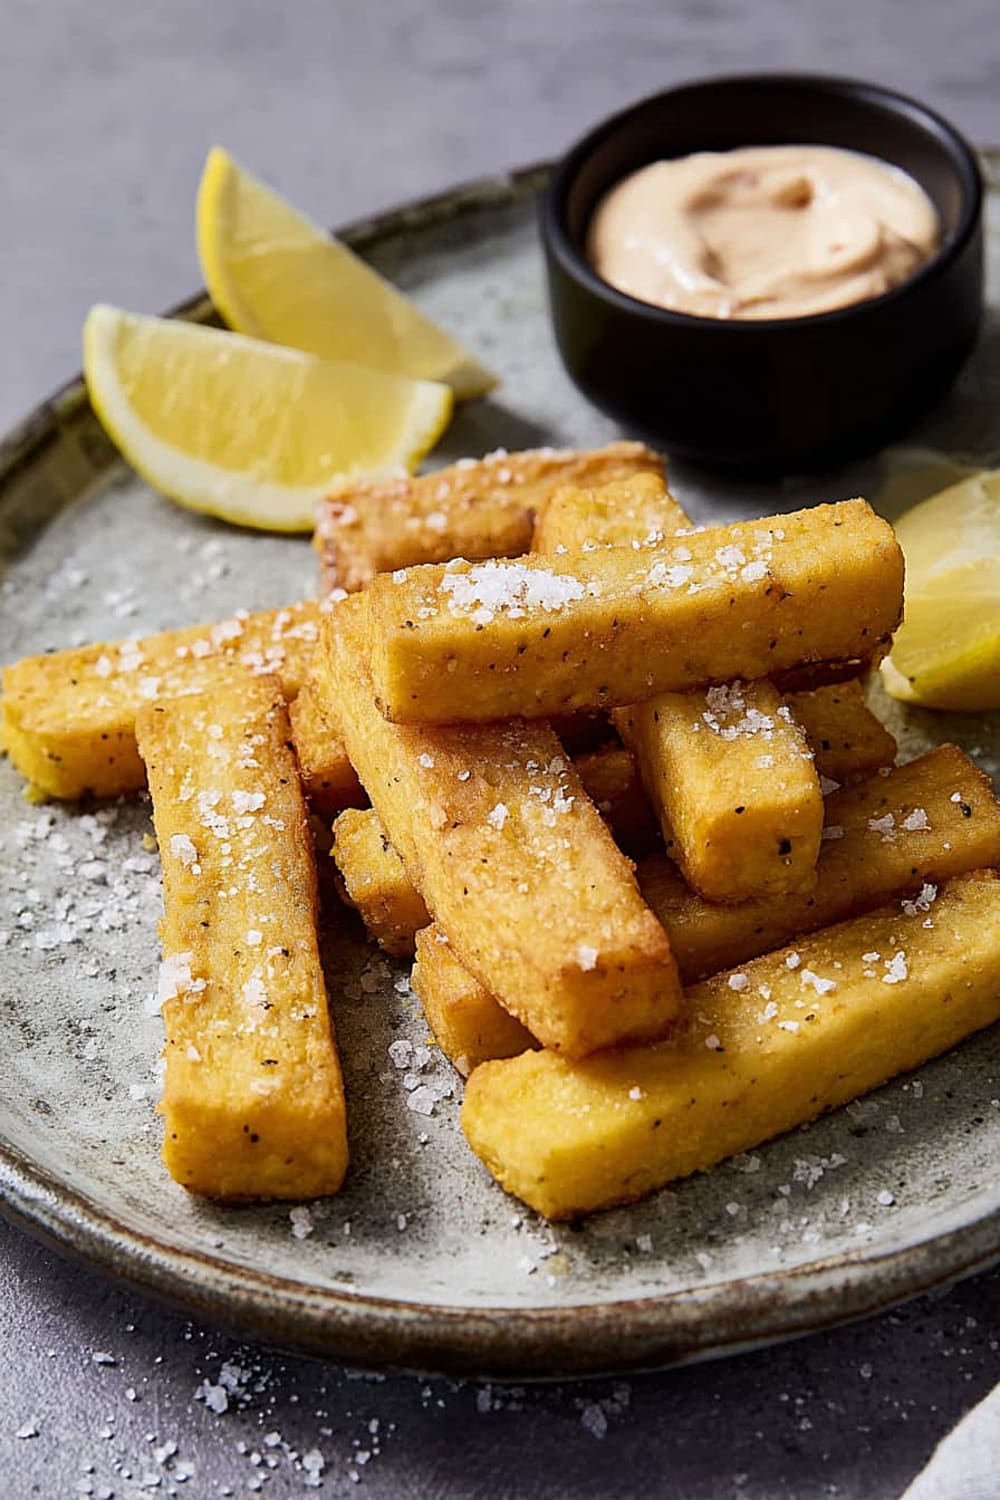
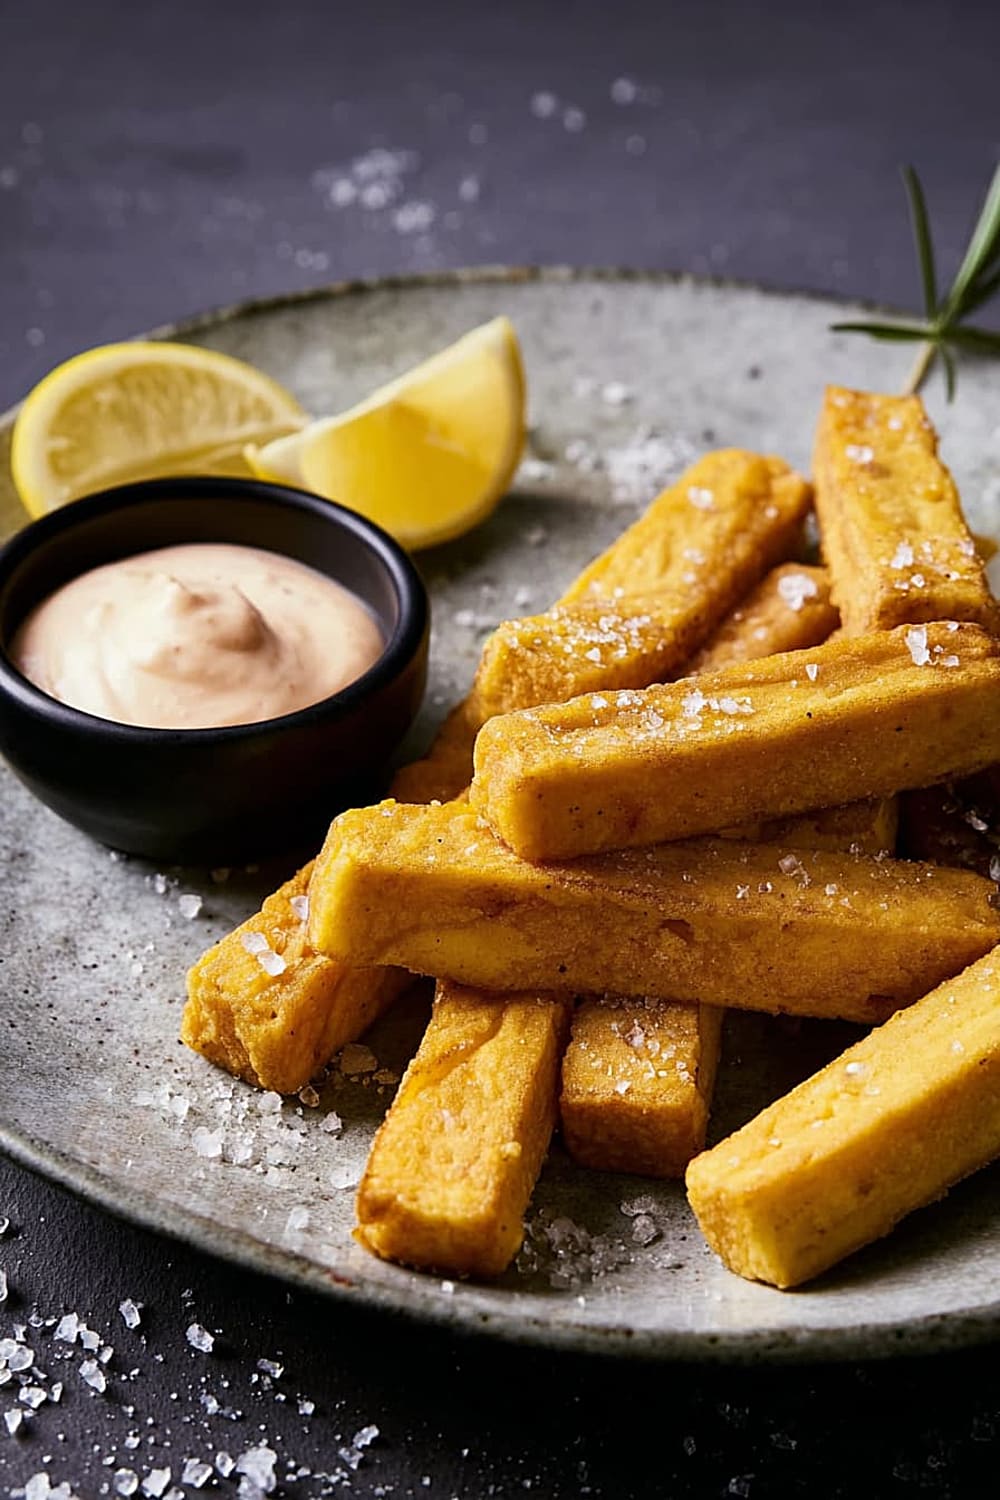
- Flaky salt
- Freshly ground black pepper
Serving Options
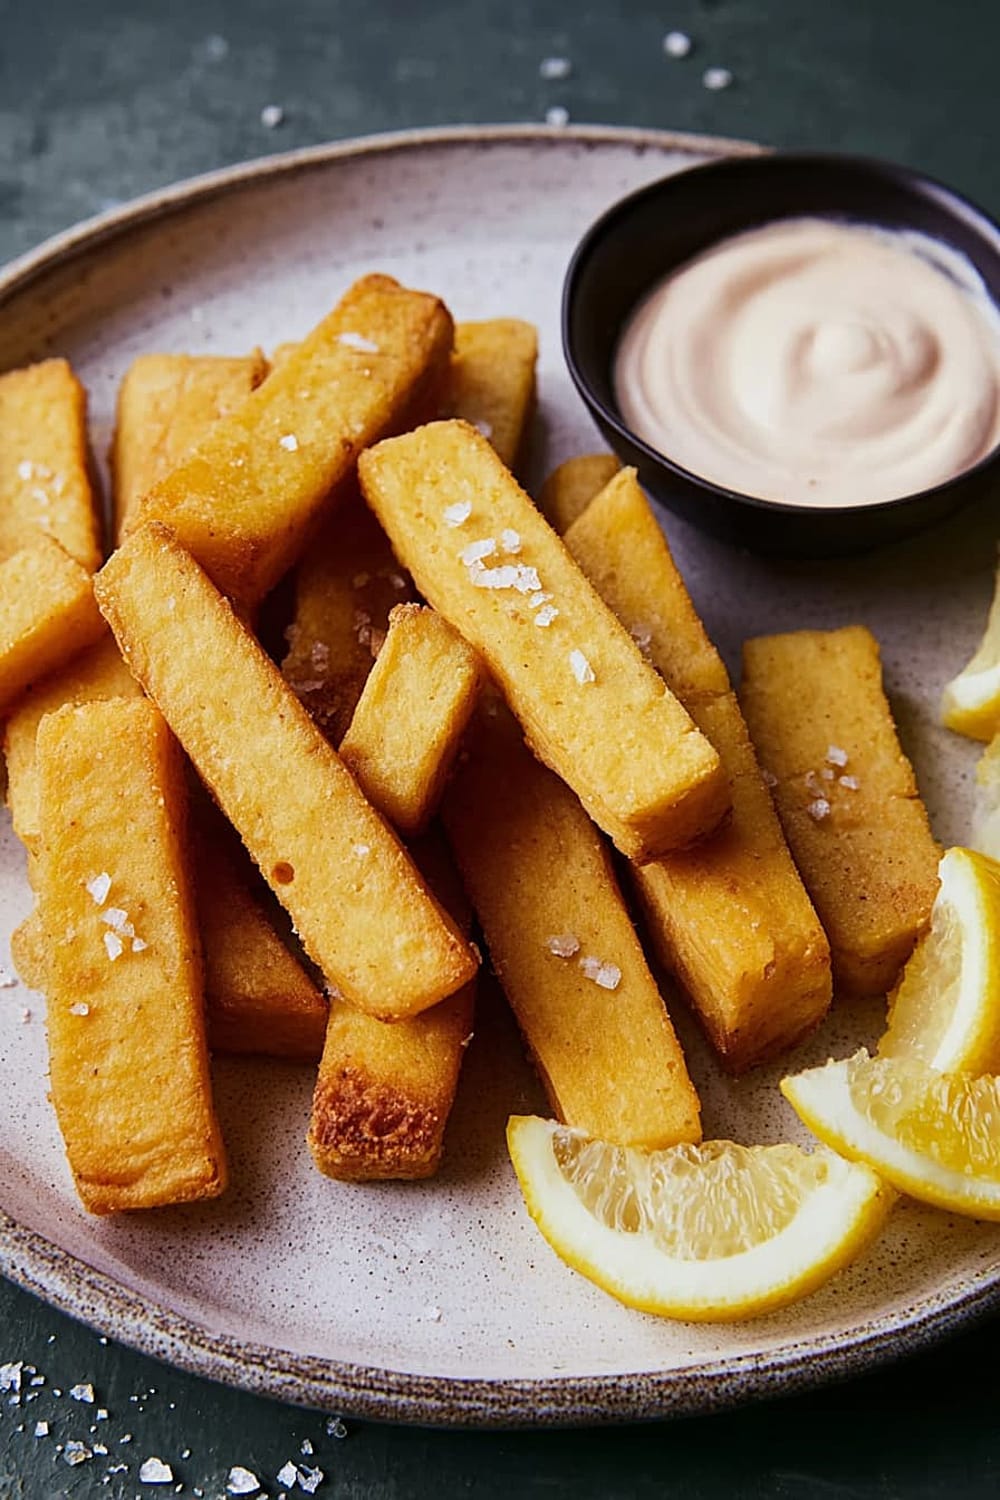
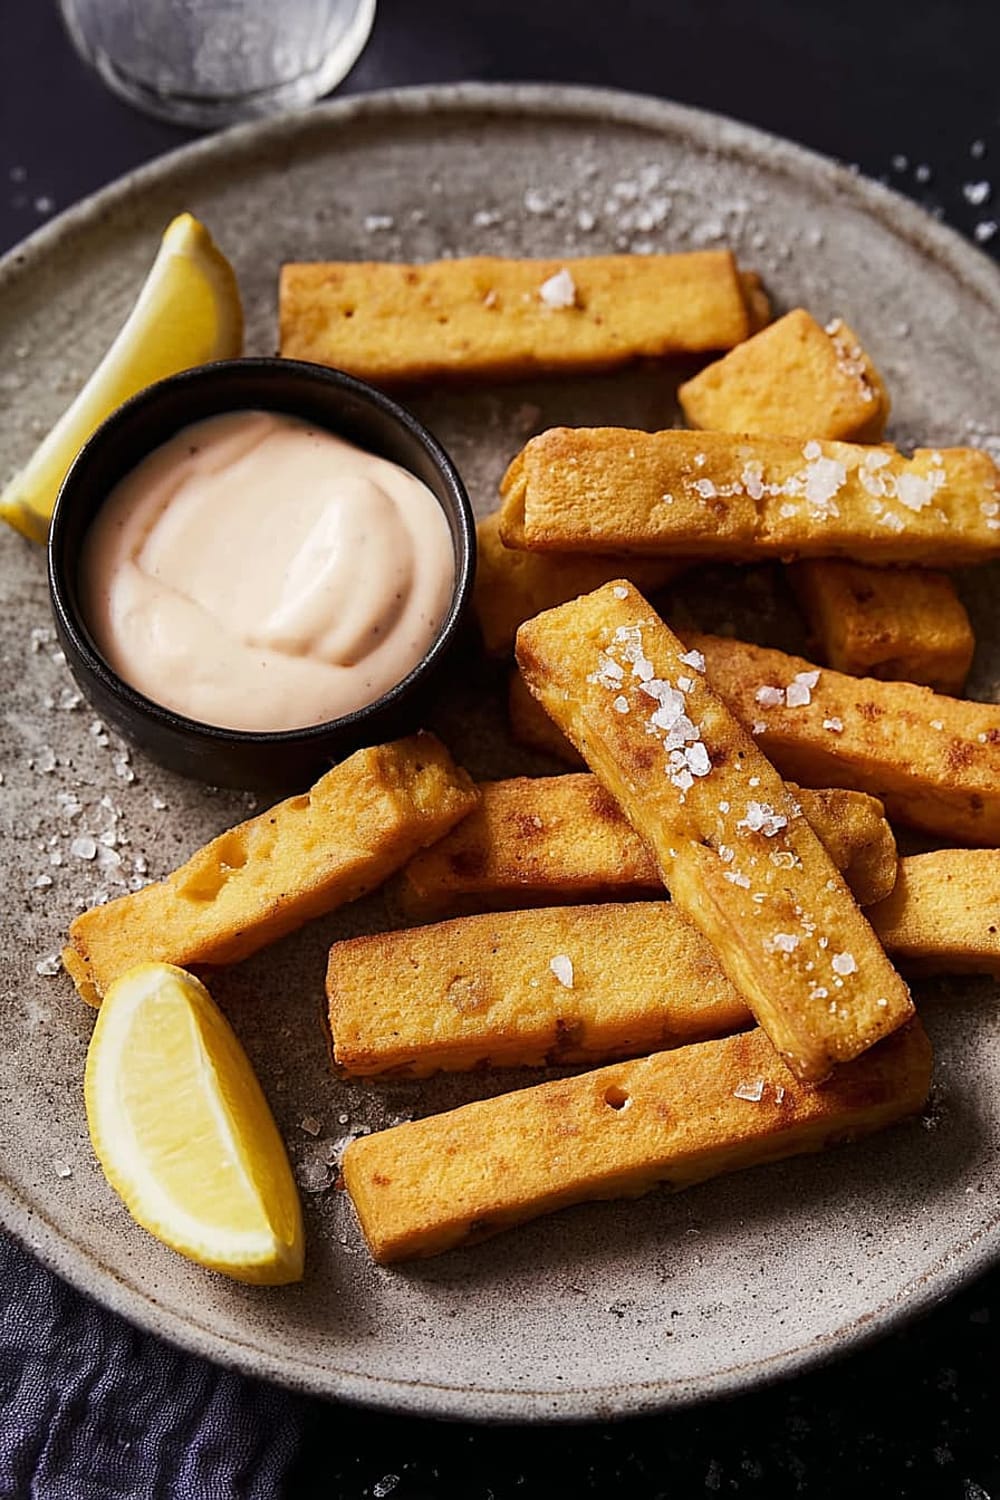
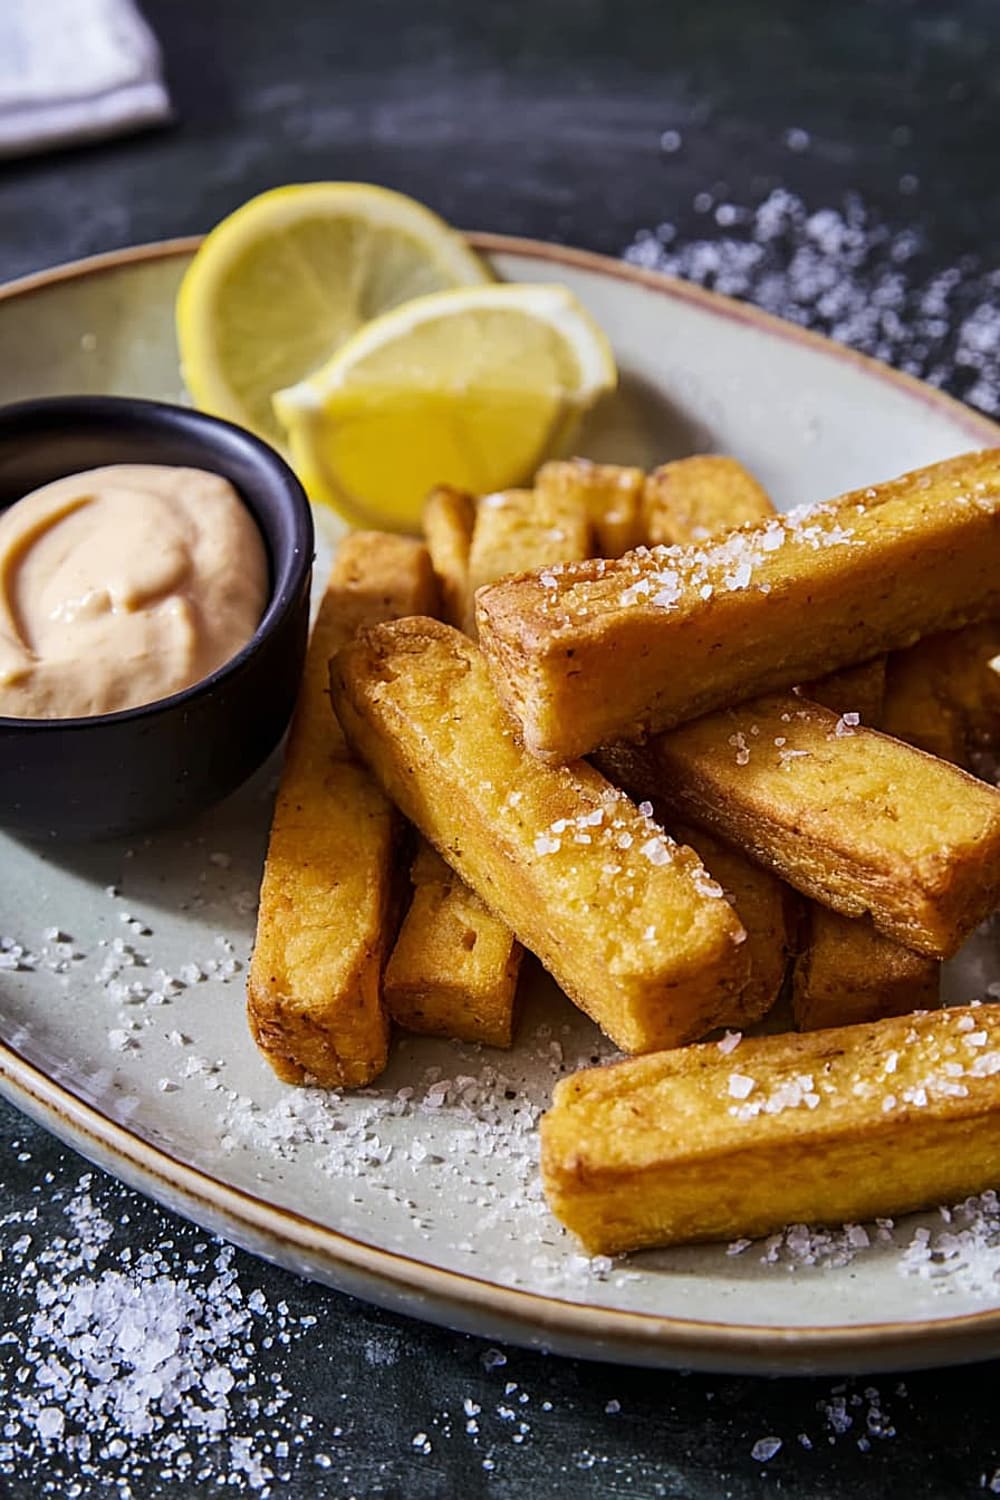
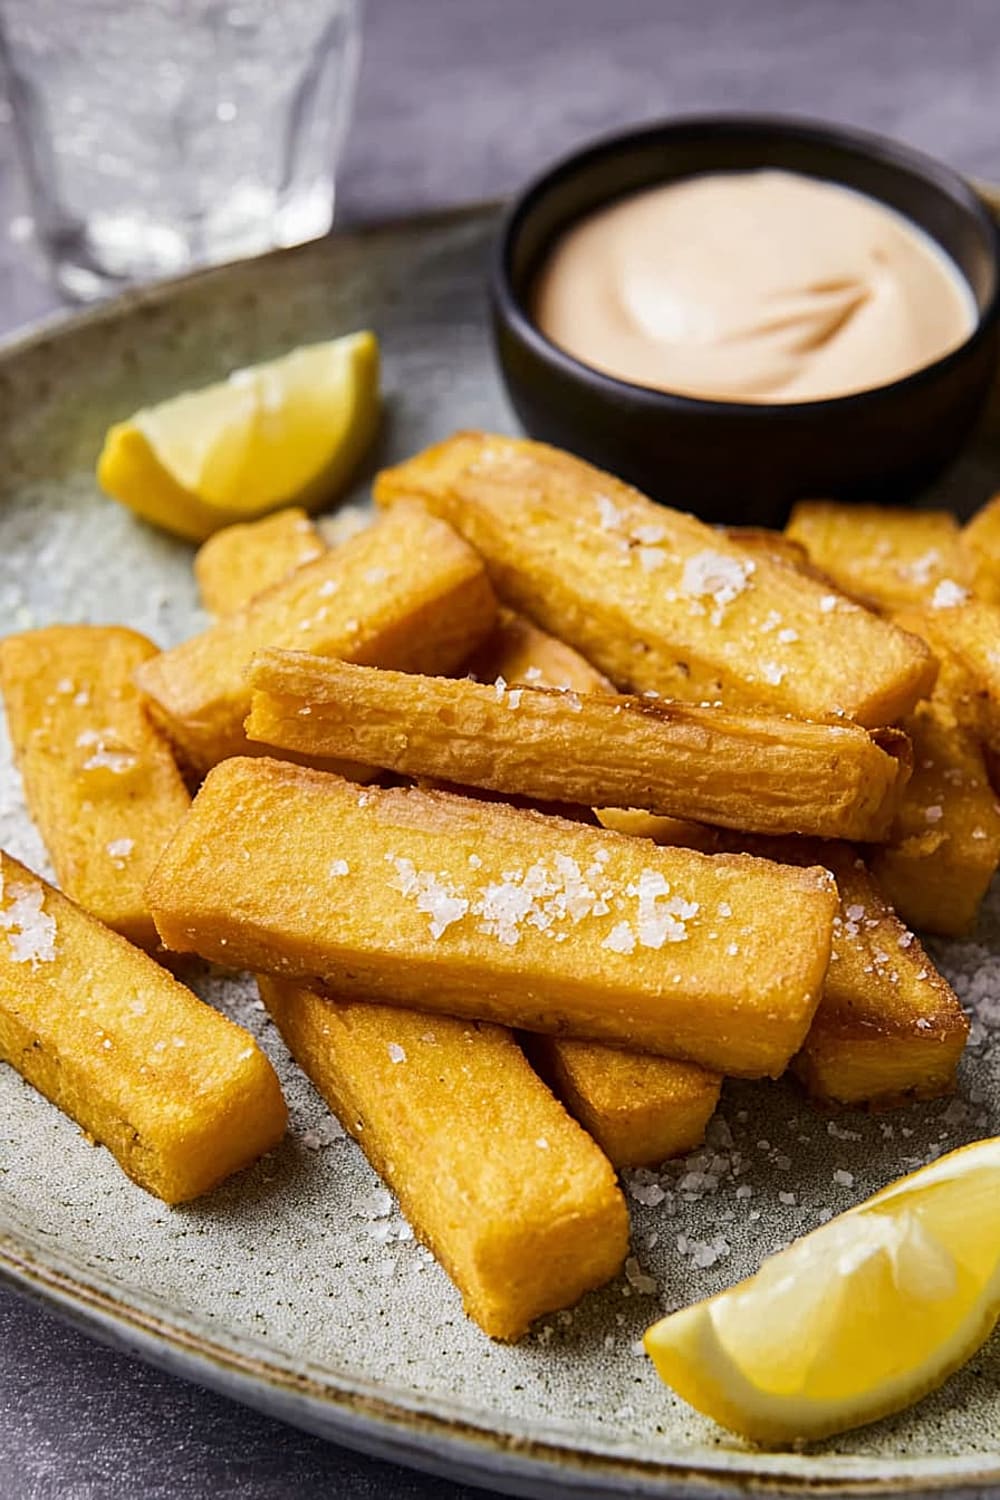
- Lemon wedges for squeezing
- Sriracha mayo or harissa mayo for dipping
Instructions
Prepare the Chickpea Base
- 1 Bring 4 cups water to a rolling boil in a large saucepan over high heat. While the water heats, sift 2 cups chickpea flour into a medium bowl using a fine-mesh sieve to eliminate lumps, then whisk in 1 teaspoon kosher salt. This sifting step is crucial for achieving a smooth, lump-free panisse texture.
- 2 Generously coat an 8- or 9-inch square or round baking pan with olive oil, making sure to get into all corners. The oil prevents sticking and helps create that perfect golden crust later. Use a pastry brush or paper towel to ensure even coverage.
Cook the Mixture
- 3 While whisking the boiling water constantly with a sturdy whisk, slowly pour the chickpea flour mixture into the pot in a steady stream. This gradual addition prevents lumps from forming and ensures a smooth consistency. Reduce heat to medium-low immediately after adding all the flour.
- 4 Continue cooking while whisking constantly for 20 minutes, being careful as the mixture may bubble and splatter. Reduce heat if the bubbling becomes too aggressive. The mixture will gradually thicken and transform into a glossy, sticky consistency that resembles cake batter with some small lumps remaining. Taste and season with additional kosher salt as needed.
Set and Cool
- 5 Pour the hot mixture into your prepared baking dish and immediately smooth the top with an offset spatula, working quickly before it begins to set. The surface should be as level as possible for even slicing later.
- 6 Let cool completely at room temperature for 90 minutes until firm and sliceable. For faster cooling, let stand for 15 minutes, then lightly cover with plastic wrap and refrigerate for 30 minutes. The panisse is ready when you can cleanly invert it from the pan.
Cut and Fry
- 7 When ready to fry, run a knife around the edges of the pan, then invert onto a cutting board to release the panisse slab. Cut the slab in half, then cut each piece crosswise into 3/4-inch-thick pieces. You can adjust thickness based on preference – thinner pieces will be crispier, while thicker ones maintain more creamy interior.
- 8 Heat 1 1/2 cups olive oil in a large skillet over medium-high heat until it reaches 350°F (175°C) on an instant-read thermometer. The oil should shimmer but not smoke. Working in batches of 5 or 6 pieces, carefully add panisse to the hot oil and fry for 2 1/2 minutes per side, flipping once, until golden-brown all over.
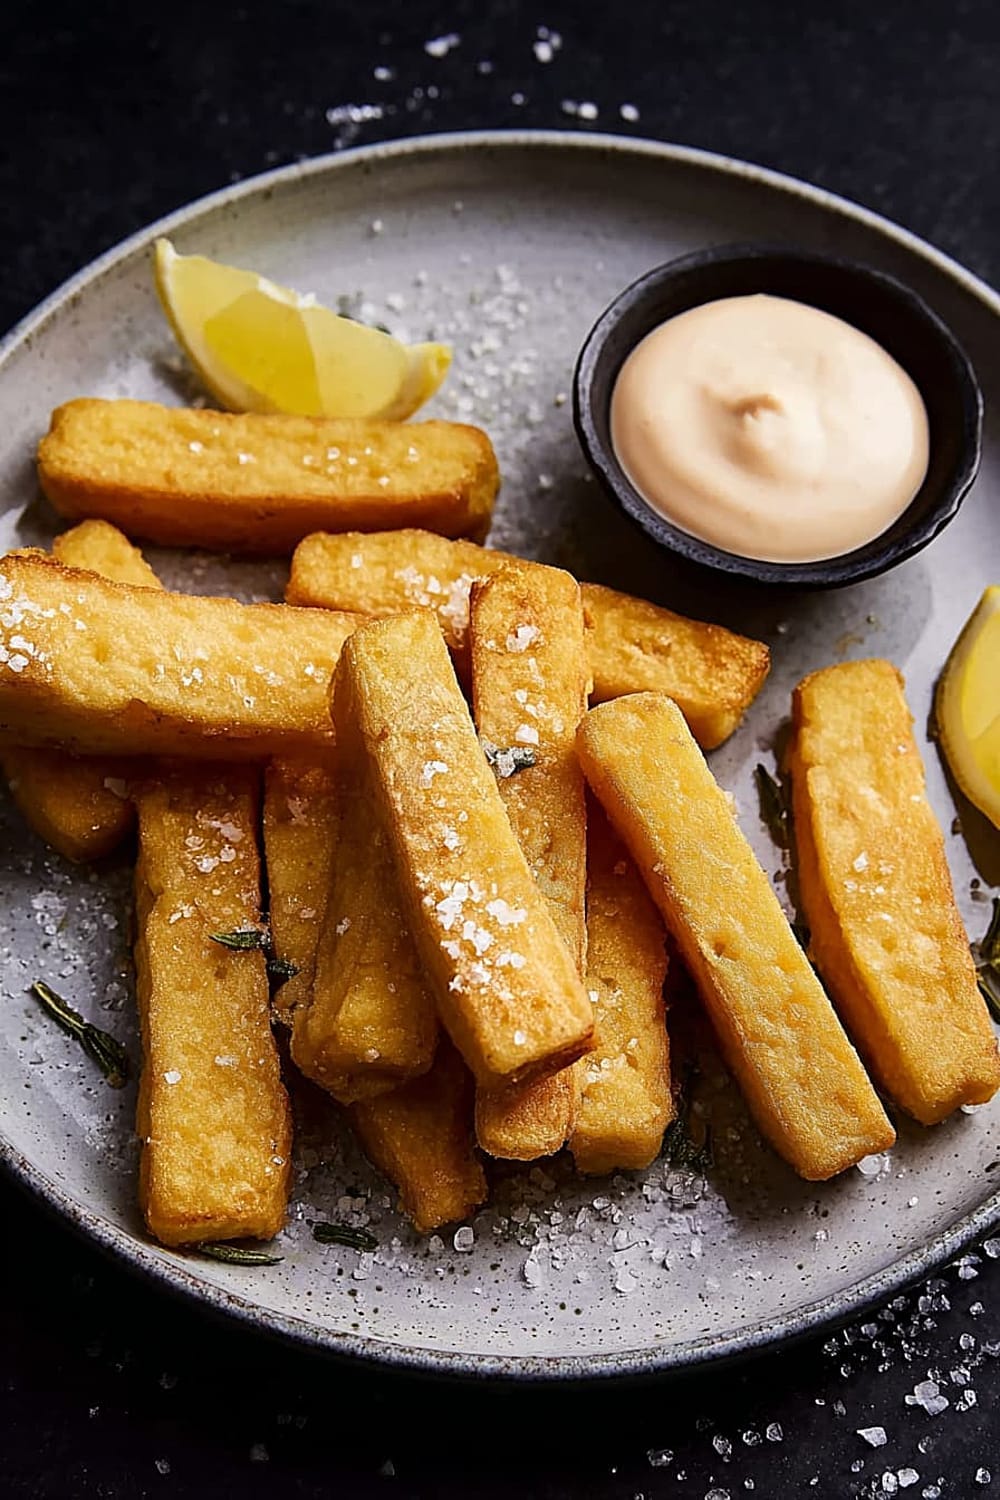
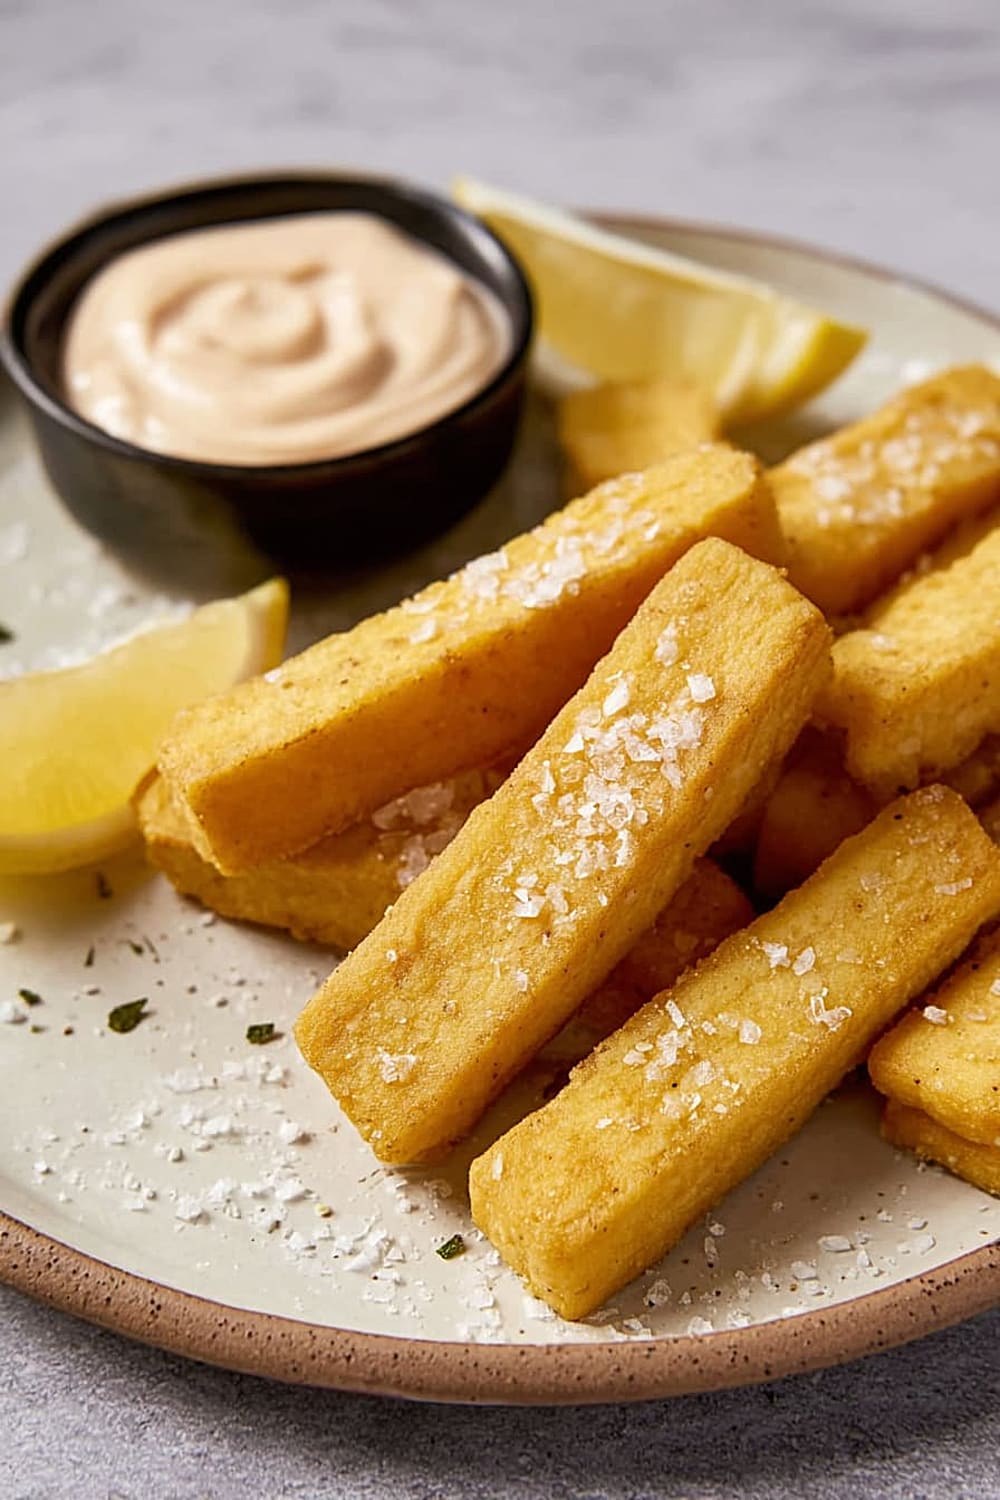
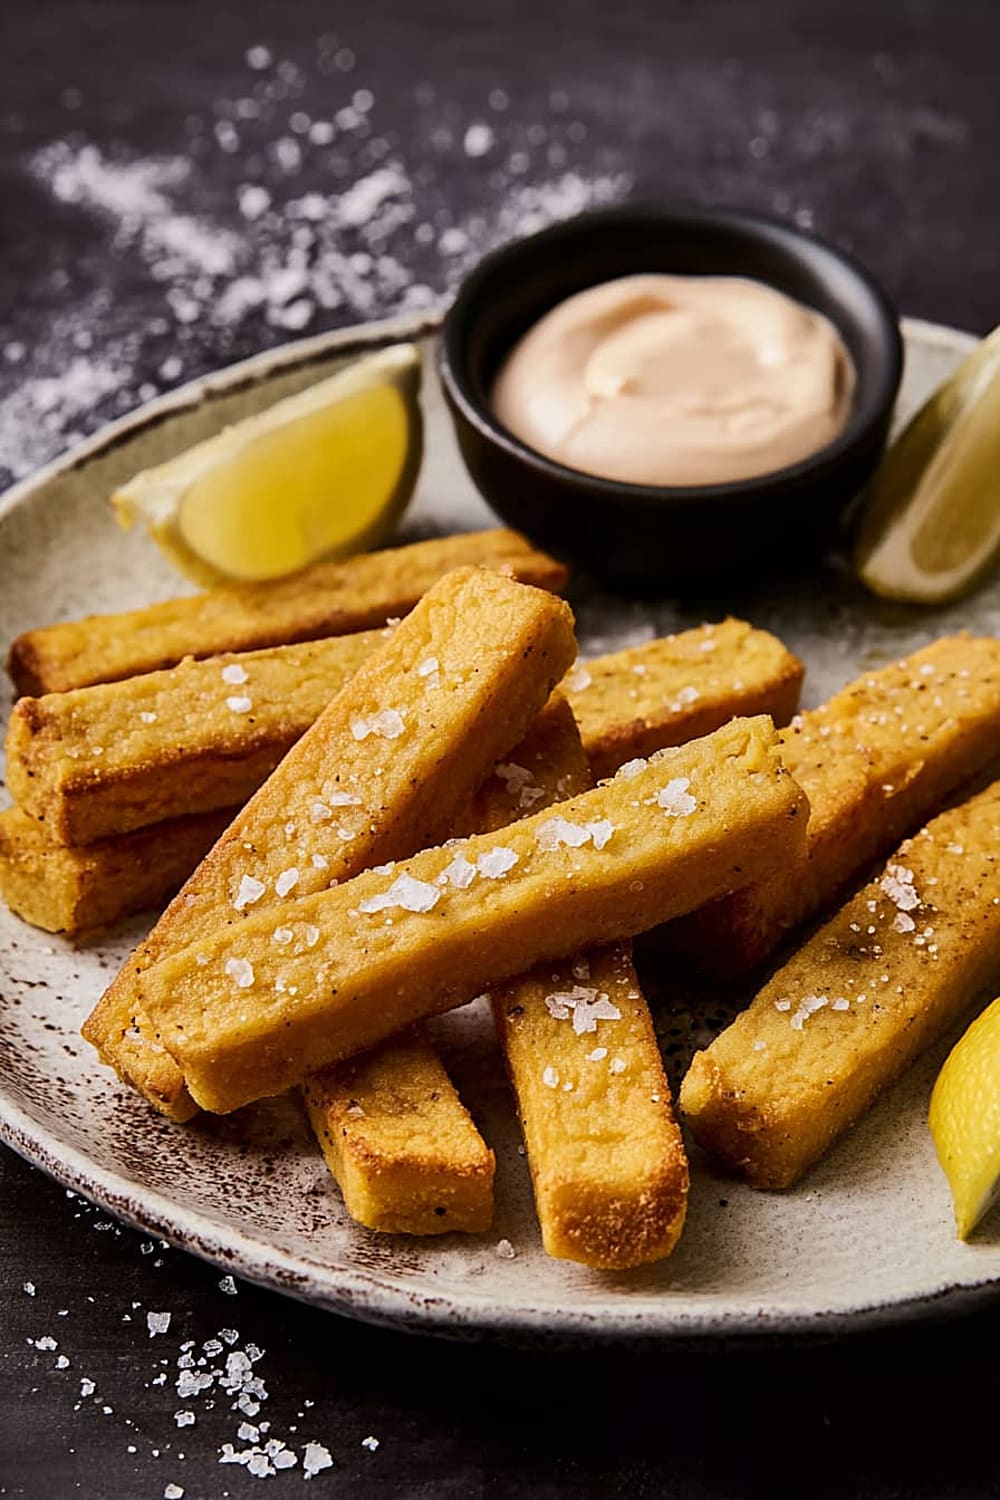
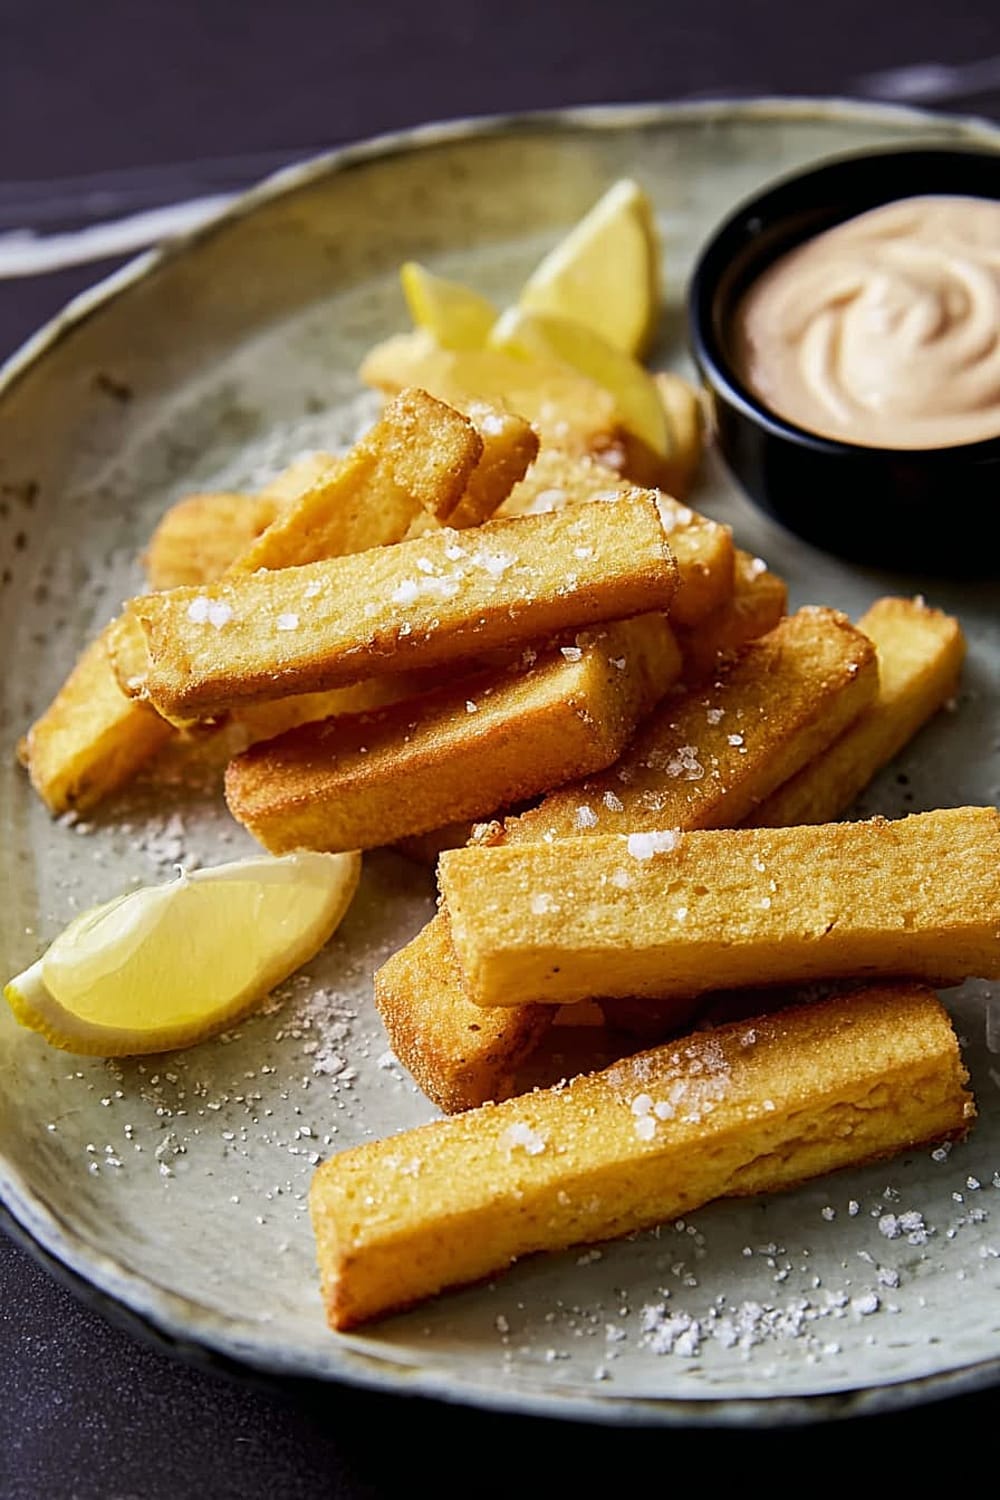
- 9 Transfer fried panisse to a paper towel-lined plate to drain excess oil. Immediately sprinkle with kosher salt, flaky salt, or freshly ground black pepper while still hot. Serve immediately with lemon wedges for squeezing, or your favorite dipping sauce like Sriracha mayo or harissa mayo.
Recommended Equipment and Kitchen Tools
Essential Tools (for best results):
- Large saucepan with heavy bottom – prevents scorching during the long whisking process and distributes heat evenly
- Sturdy whisk – you’ll be whisking constantly for 20 minutes, so a comfortable grip is essential
- Fine-mesh sieve – eliminates lumps from chickpea flour for silky smooth texture
- Instant-read thermometer – ensures oil reaches perfect 350°F (175°C) for optimal frying
Helpful Upgrades:
- Offset spatula – makes smoothing the panisse surface much easier than a regular spatula
- Cast iron skillet – maintains consistent oil temperature better than thin pans, resulting in more even browning
- Kitchen scale – measuring chickpea flour by weight ensures consistent results every time
- Bench scraper – perfect for cleanly cutting the set panisse into uniform pieces
Nice-to-Have Options:
- Silicone spatula – helpful for scraping every bit of mixture from the saucepan
- Parchment paper – line your baking dish for even easier release, though oil works perfectly fine
- Wire cooling rack – keeps fried panisse crispier than paper towels by allowing air circulation underneath
Recipe Variations and Dietary Modifications
Flavor Enhancement Options:
- Herbed Panisse – whisk in 2 tablespoons fresh chopped herbs like rosemary, thyme, or sage during cooking
- Spiced Version – add 1 teaspoon smoked paprika, cumin, or za’atar to the chickpea flour mixture
- Garlic Panisse – infuse the olive oil with 3 crushed garlic cloves before coating the pan
- Cheese Variation – fold in 1/2 cup grated Parmesan or nutritional yeast just before pouring into the pan
Cooking Method Alternatives:
- Baked Panisse – brush cut pieces with olive oil and bake at 425°F (220°C) for 15-20 minutes, flipping once
- Grilled Version – brush with oil and grill over medium heat for 3-4 minutes per side for smoky flavor
- Pan-Fried Light – use just 2 tablespoons oil in a non-stick pan for a lighter version
Shape Variations:
- Panisse Chips – cut into thin rounds for maximum crispiness
- Finger Foods – cut into small cubes for bite-sized appetizers
- Rustic Wedges – cut into irregular triangular pieces for casual presentation
International Twists:
- Mediterranean Style – serve with tzatziki and fresh herbs
- Middle Eastern – pair with tahini sauce and sumac
- Indian-Inspired – season with garam masala and serve with mint chutney
Nutritional Information and Health Benefits
Key Nutritional Highlights:
Each serving of panisse provides approximately 180-220 calories depending on frying oil absorption, with the majority coming from complex carbohydrates and plant-based protein. Chickpea flour delivers about 6-8 grams of protein per serving, making these fries a more nutritionally dense alternative to traditional potato fries. The fiber content reaches 4-5 grams per serving, supporting digestive health and providing sustained energy without blood sugar spikes.
Health Benefits of Main Ingredients:
Chickpea flour stands out as a nutritional powerhouse, packed with folate, iron, and magnesium essential for energy metabolism and red blood cell formation. The high protein content includes all essential amino acids, making panisse an excellent choice for vegetarians and vegans. Chickpeas naturally contain saponins and other compounds with anti-inflammatory properties, while their low glycemic index helps maintain steady blood sugar levels. The olive oil used for frying provides heart-healthy monounsaturated fats and vitamin E, though the amount absorbed during proper frying is relatively minimal.
Dietary Considerations:
Panisse are naturally gluten-free, dairy-free, and vegan, making them suitable for multiple dietary restrictions simultaneously. They’re also naturally low in sodium when prepared as written, with salt content easily adjustable to taste. The high fiber and protein content makes them more satiating than traditional fried snacks, potentially supporting weight management goals when enjoyed in reasonable portions.
Smart Swaps and Ingredient Substitutions
Chickpea Flour Alternatives:
- Besan flour → Direct 1:1 substitution (this is actually the same ingredient by another name)
- Gram flour → Another name for chickpea flour, use exactly the same amount
- Garbanzo bean flour → Complete equivalent, no adjustments needed
Oil Substitutions:
- Olive oil for frying → Avocado oil or sunflower oil for higher smoke points and neutral flavor
- Coconut oil → Use refined coconut oil to avoid coconut flavor, same amount
- Vegetable oil → Any neutral oil works, though flavor will be less complex
Pan Preparation Options:
- Olive oil coating → Cooking spray for lighter option, or butter for richer flavor
- Parchment paper → Line oiled pan for guaranteed easy release
- Silicone molds → Individual portions in muffin tins for party presentation
Salt Variations:
- Kosher salt → Sea salt or table salt using 3/4 the amount due to finer crystals
- Flaky finishing salt → Coarse sea salt, smoked salt, or herb salt for different flavor profiles
Budget-Friendly Tips:
- Buy chickpea flour in bulk from Indian grocery stores where it’s often called “besan” and costs significantly less
- Premium olive oil → Use regular olive oil for frying and save extra virgin for drizzling
Make It Diabetes-Friendly
Carbohydrate Considerations:
- Standard serving contains approximately 25-30 grams carbohydrates, primarily from chickpea flour
- Portion control – serve 2-3 pieces instead of 4-5 to reduce carb load to 15-20 grams
- Fiber benefit – the 4-5 grams of fiber per serving helps slow glucose absorption
Cooking Method Modifications:
- Baked version – eliminates added fats and reduces calories by approximately 30-40%
- Air fryer option – brush lightly with oil and air fry at 400°F (200°C) for 8-10 minutes
- Smaller portions – cut into 1/2-inch thick pieces for built-in portion control
Blood Sugar Management Tips:
- Protein pairing – serve with Greek yogurt dip or hummus to further slow carb absorption
- Timing strategy – enjoy as part of a balanced meal rather than standalone snack
- Healthy fats – the olive oil used helps moderate blood sugar response
Nutritional Advantages:
- Low glycemic index – chickpeas rank low on GI scale compared to potatoes
- Protein content – 6-8 grams per serving helps maintain stable blood sugar
- No added sugars – naturally free from simple carbohydrates that spike glucose
Total Carb Reduction Potential: Up to 40% reduction when baked and served in smaller portions
Perfect Pairing Suggestions
Beverage Pairings:
Panisse pair beautifully with crisp, dry wines that complement their nutty richness without overwhelming the delicate chickpea flavor. Provence rosé or Sancerre provide the perfect acidic contrast, while Spanish Albariño echoes the Mediterranean coastal origins. For beer lovers, Belgian wheat beer or light pilsner offer refreshing counterpoints. Non-alcoholic options include sparkling water with lemon, iced green tea, or fresh mint lemonade that cleanse the palate between bites.
Dipping Sauce Combinations:
Beyond the classic harissa mayo and Sriracha mayo, consider garlic aioli with fresh herbs, tahini sauce with lemon and garlic, or romesco sauce for Spanish flair. Tzatziki provides cooling contrast, while chimichurri adds bright herbaceous notes. For something different, try baba ganoush or muhammara for Middle Eastern inspiration.
Complete Meal Ideas:
Serve panisse as part of a Mediterranean mezze spread alongside olives, roasted red peppers, fresh mozzarella, and crusty bread. For casual entertaining, pair with grilled vegetables and herbed goat cheese. They also make excellent sides for grilled fish, roasted chicken, or lamb kebabs, providing satisfying substance without competing flavors.
Seasonal Serving Suggestions:
Summer calls for serving alongside fresh tomato salad and basil, while winter pairs beautifully with roasted root vegetables and warming spices. Spring presentation might include pea shoots and lemon vinaigrette, and fall service could feature roasted butternut squash and sage.
Pro Tips and Troubleshooting
Professional Techniques:
The key to silky-smooth panisse lies in constant whisking during the 20-minute cooking phase – your arm will get tired, but this prevents lumps and ensures even cooking. Use a figure-8 motion rather than circular whisking to reach all areas of the pan bottom. Professional chefs often cook panisse a day ahead, as the flavors develop and the texture improves overnight in the refrigerator.
Common Mistake Prevention:
Never add the chickpea flour mixture too quickly to the boiling water, as this creates stubborn lumps that won’t dissolve. If lumps do form, don’t panic – continue whisking vigorously and most will break down during the long cooking process. Avoid cutting the panisse while still warm, as it will crumble and lose its shape. The mixture should feel firm and bounce back slightly when pressed.
Storage and Make-Ahead Strategies:
Unfried panisse keeps perfectly in the refrigerator for up to 4 days wrapped in plastic wrap. For longer storage, freeze cut pieces on a baking sheet, then transfer to freezer bags for up to 3 months. Fry directly from frozen, adding an extra 30 seconds per side. Fried panisse are best enjoyed immediately but can be reheated in a 400°F (200°C) oven for 5-7 minutes to restore crispiness.
Scaling and Presentation:
This recipe doubles easily for larger crowds – just use a larger pan or divide between two pans for quicker cooling. For elegant presentation, cut into uniform rectangles and arrange standing up on the plate. Garnish with microgreens, a drizzle of good olive oil, and a sprinkle of flaky salt for restaurant-quality plating.
There you have it – your ticket to crispy, golden panisse perfection that’ll have everyone asking for the recipe! These chickpea fries prove that sometimes the best discoveries come from the simplest ingredients transformed through technique and a little patience. Whether you’re impressing dinner guests or just treating yourself to something special, panisse deliver that perfect combination of comfort and sophistication that makes every bite memorable. So fire up that stove, grab your whisk, and get ready to fall head over heels for these irresistible golden beauties!