Crockpot White Chicken Chili
I’ve included some videos I found relevant and helpful. 😍

Are you looking for an easy, tasty meal that practically cooks itself? Crockpot white chicken chili is the answer. This simple recipe takes just 10 minutes to prep and then cooks for 8 hours while you go about your day. When you get home, you’ll have a warm, comforting dinner ready to eat.

This chili is packed with flavor from chicken, beans, corn, and green chiles. The slow cooker does all the work, letting the ingredients meld together into a creamy, satisfying dish. With 227 calories per serving, it’s a filling meal that won’t weigh you down. Grab your crockpot and get ready to make your new favorite chili!
Exact Ingredients List
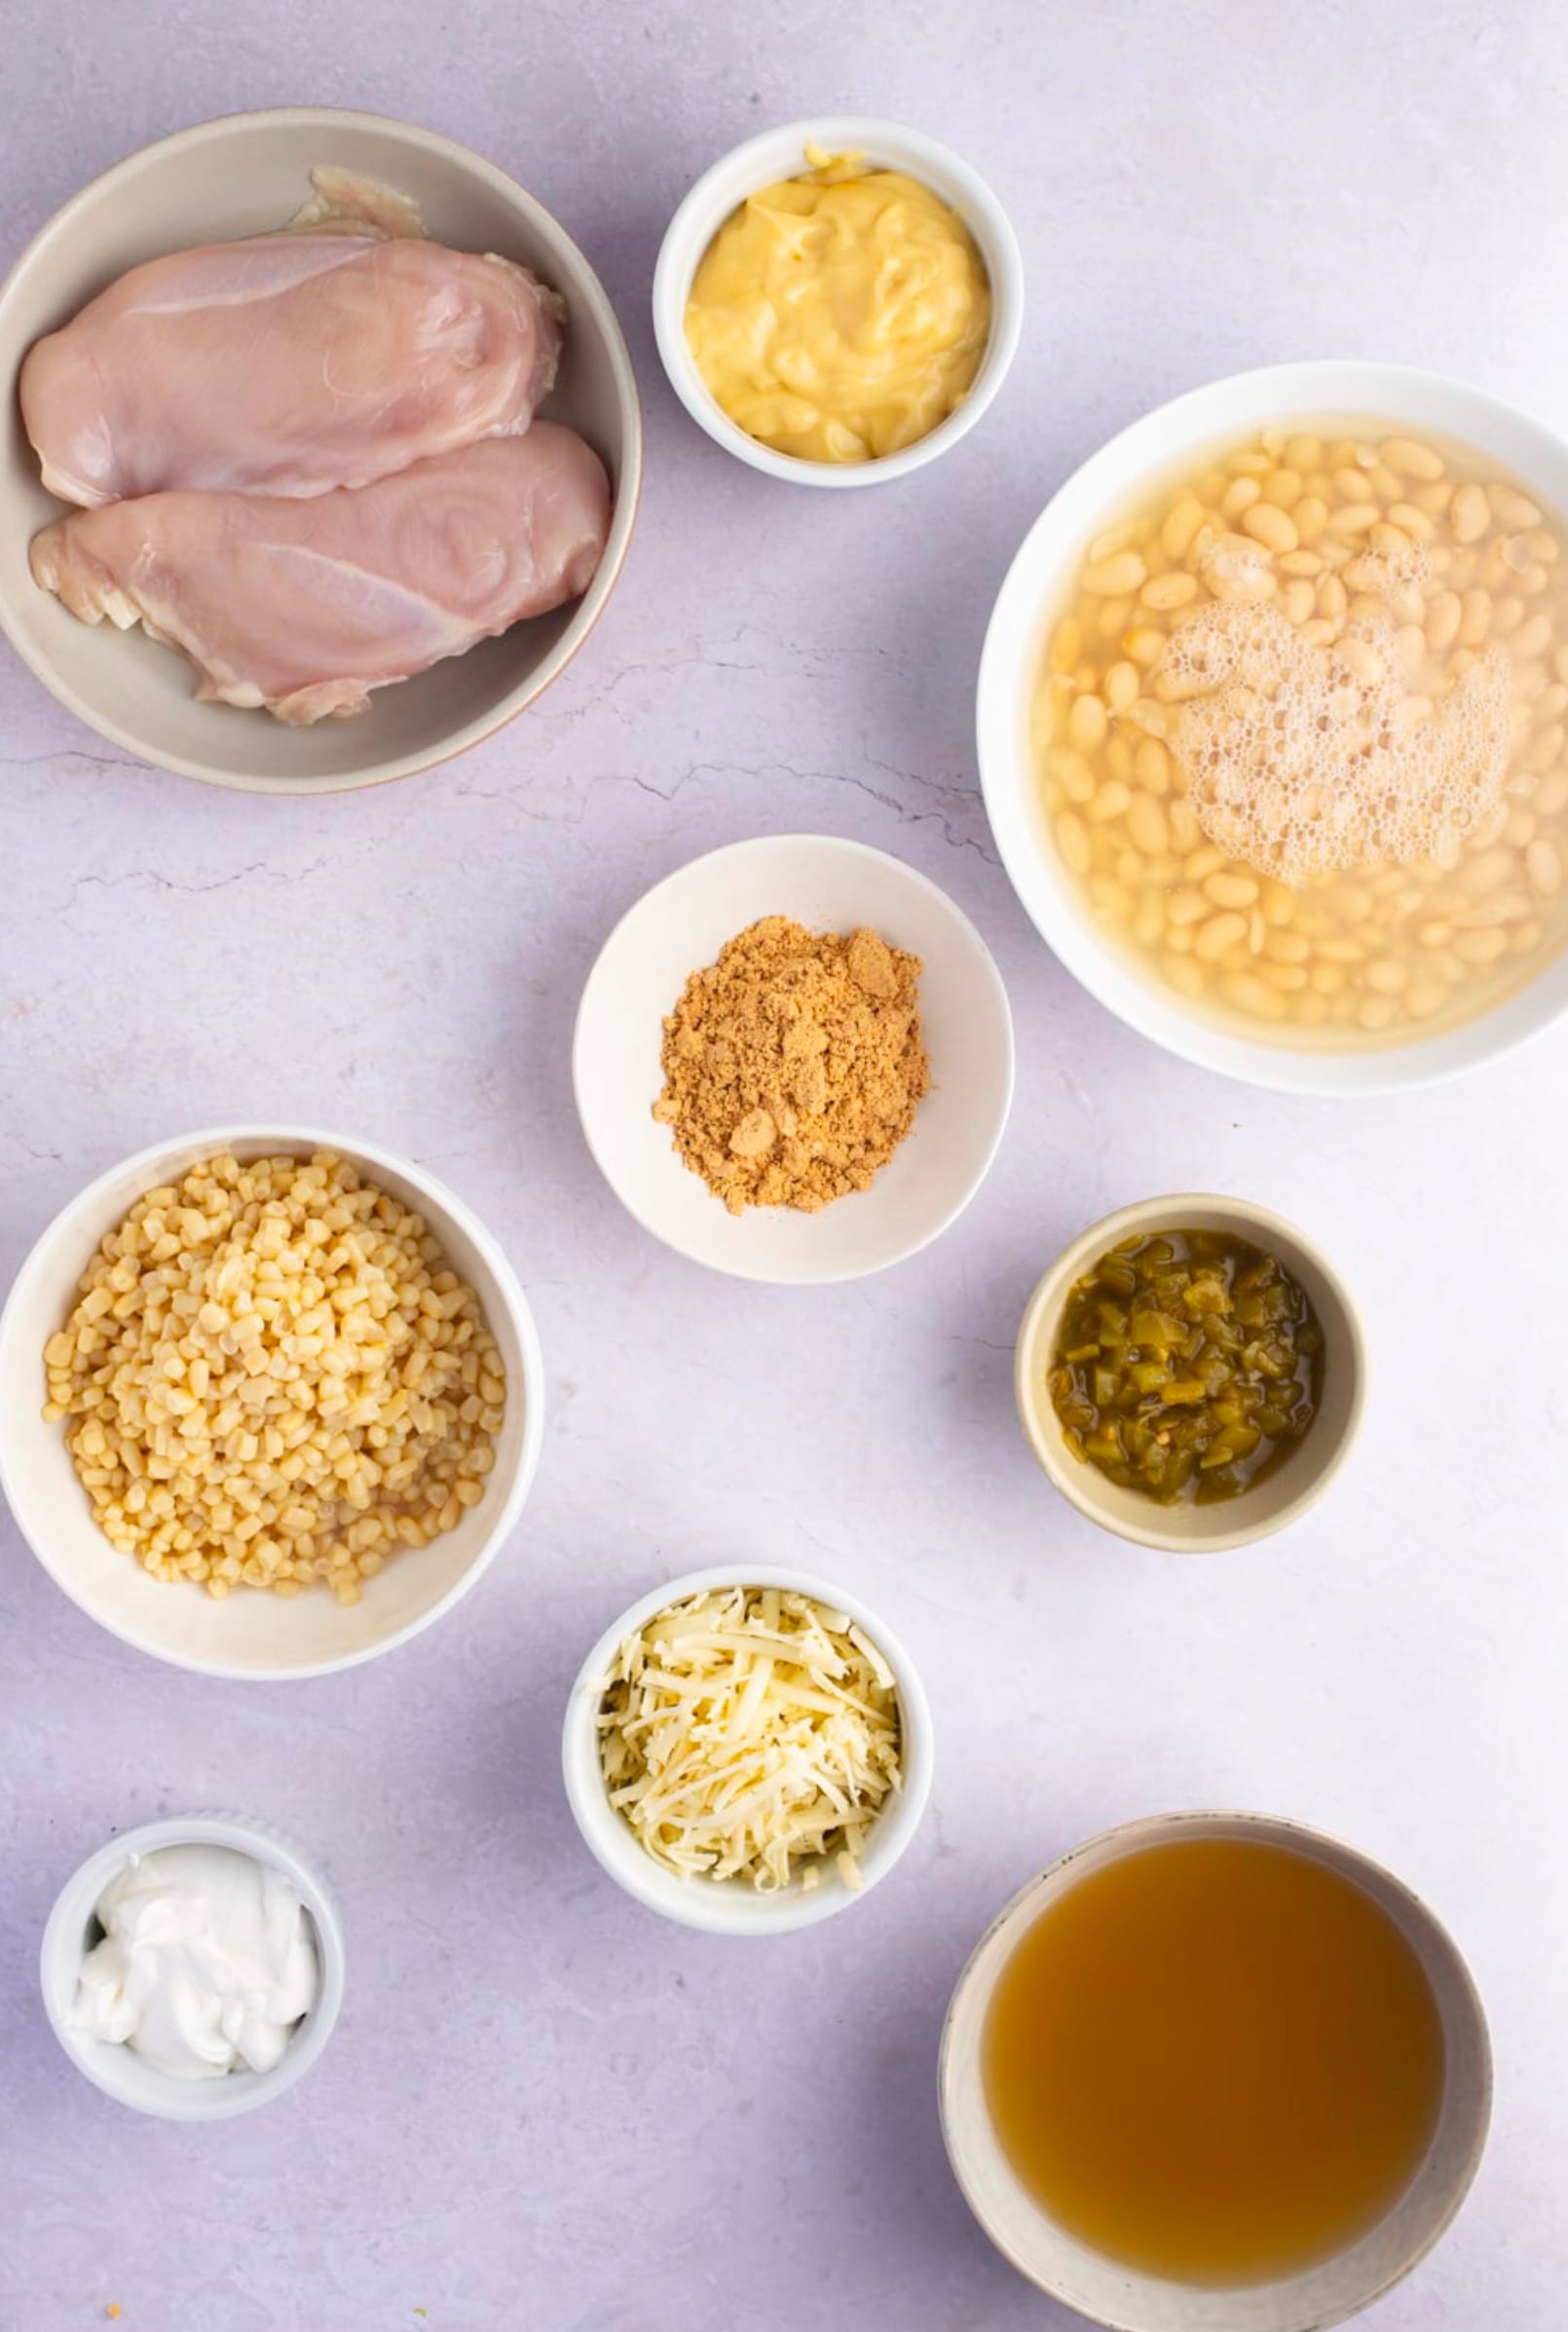
Here’s what you’ll need to make this tasty crockpot white chicken chili:
- 1 1/4 pounds skinless, boneless chicken breast
- 2 (15 oz) cans great Northern beans
- 1 (15 oz) can white corn
- 1 (14 oz) can chicken broth
- 1 (10.5 oz) can cream of chicken soup
- 1 (4 oz) can chopped green chile peppers
- 1 (1.25 oz) packet taco seasoning
- 1/2 cup sour cream
- 1/2 cup shredded pepper Jack cheese
This recipe makes 10 servings. It’s perfect for feeding a crowd or having leftovers for busy weeknights.
Remember to drain and rinse the beans and corn before adding them to your slow cooker. This helps reduce sodium and prevents the chili from being too watery.
For extra flavor, you can add some diced onions or minced garlic. Feel free to adjust the amount of taco seasoning to suit your taste preferences.
Don’t forget to grab some cornbread to serve on the side. It’s the perfect companion to this warm and cozy chili!

Instructions

Start by layering the beans and corn in your slow cooker. Place the chicken breasts on top of this base.
Mix the chicken broth, cream of chicken soup, green chiles, and taco seasoning in a bowl. Pour this mixture over the chicken.
Cover and cook on low for 8 hours. After cooking, check that the chicken is done. It should reach 165°F inside.
Shred the cooked chicken using two forks. Stir in the sour cream and cheese.
Let the cheese melt for 3-5 minutes. Your chili is now ready to serve!
Dish it up in bowls. For extra yumminess, add some cornbread on the side.
Remember to stir before serving. The flavors will be even better the next day if you have leftovers.
You can top your chili with extra cheese, cilantro, or a dollop of sour cream if you like. Enjoy your warm, cozy meal!

Possible Substitutes List
You can easily swap out ingredients in this white chicken chili recipe. Here are some tasty options:
• Chicken: Use turkey breast or pork tenderloin instead
• Beans: Try pinto or navy beans as alternatives
• Corn: Swap for hominy or extra beans if you prefer
• Chicken broth: Vegetable broth works too
• Cream of chicken soup: Cream of celery or mushroom soup can add new flavors
• Green chiles: Use jalapeños for more heat or bell peppers for a milder taste
• Taco seasoning: Make your own blend with chili powder, cumin, and garlic powder
• Sour cream: Greek yogurt is a good substitute
• Pepper Jack cheese: Cheddar or Monterey Jack are nice options
Feel free to adjust amounts to your liking. You can also add extras like diced onions or minced garlic for more flavor. Don’t be afraid to make it your own!
Remember to keep the liquid levels similar if swapping ingredients. This helps maintain the right consistency for your chili.
How To Make It Diabetes-Friendly
You can make this yummy white chicken chili better for people with diabetes. Here are some easy changes:
- Use low-sodium chicken broth and beans to cut down on salt
- Pick a low-fat cream of chicken soup to lower calories
- Use less corn or skip it to reduce carbs
- Add extra veggies like zucchini or bell peppers for more nutrients
- Try Greek yogurt instead of sour cream for fewer calories and more protein
- Use less cheese or pick a low-fat option
These small tweaks can make a big difference! The chili will still taste great, but it’ll be healthier for you.
Remember to watch your portion size too. Stick to one serving and pair it with a small side salad for a balanced meal.
You can also boost the fiber by adding some chopped spinach near the end of cooking. This helps slow down how fast your body absorbs carbs.
With these changes, you can enjoy this tasty chili while keeping your blood sugar in check. It’s a win-win!
Tips, Tricks & Storing
For the best flavor, use fresh lime juice. Squeeze a lime over your bowl before eating. It adds a nice tangy kick.
You can make this chili spicier by adding extra jalapeños or hot sauce. Start with a little and taste as you go.
Try topping your chili with crushed tortilla chips, avocado slices, or extra cheese. These add nice texture and flavor.
To save time, use a rotisserie chicken instead of raw chicken breasts. Just shred it and add it near the end of cooking.
This chili keeps well in the fridge for 3-4 days. Store it in an airtight container.
You can freeze leftovers for up to 3 months. Let it cool first, then put it in freezer-safe bags or containers.
When reheating, add a splash of broth if the chili seems too thick. Heat it slowly on the stove or in the microwave.
For meal prep, make a big batch on Sunday. Divide it into portions for easy lunches or dinners during the week.
If you’re short on time, cook on high for 3-4 hours instead of low for 8 hours. Just check that the chicken is fully cooked.