Classic Buttermilk Pancakes
I’ve included some videos I found relevant and helpful. 😍
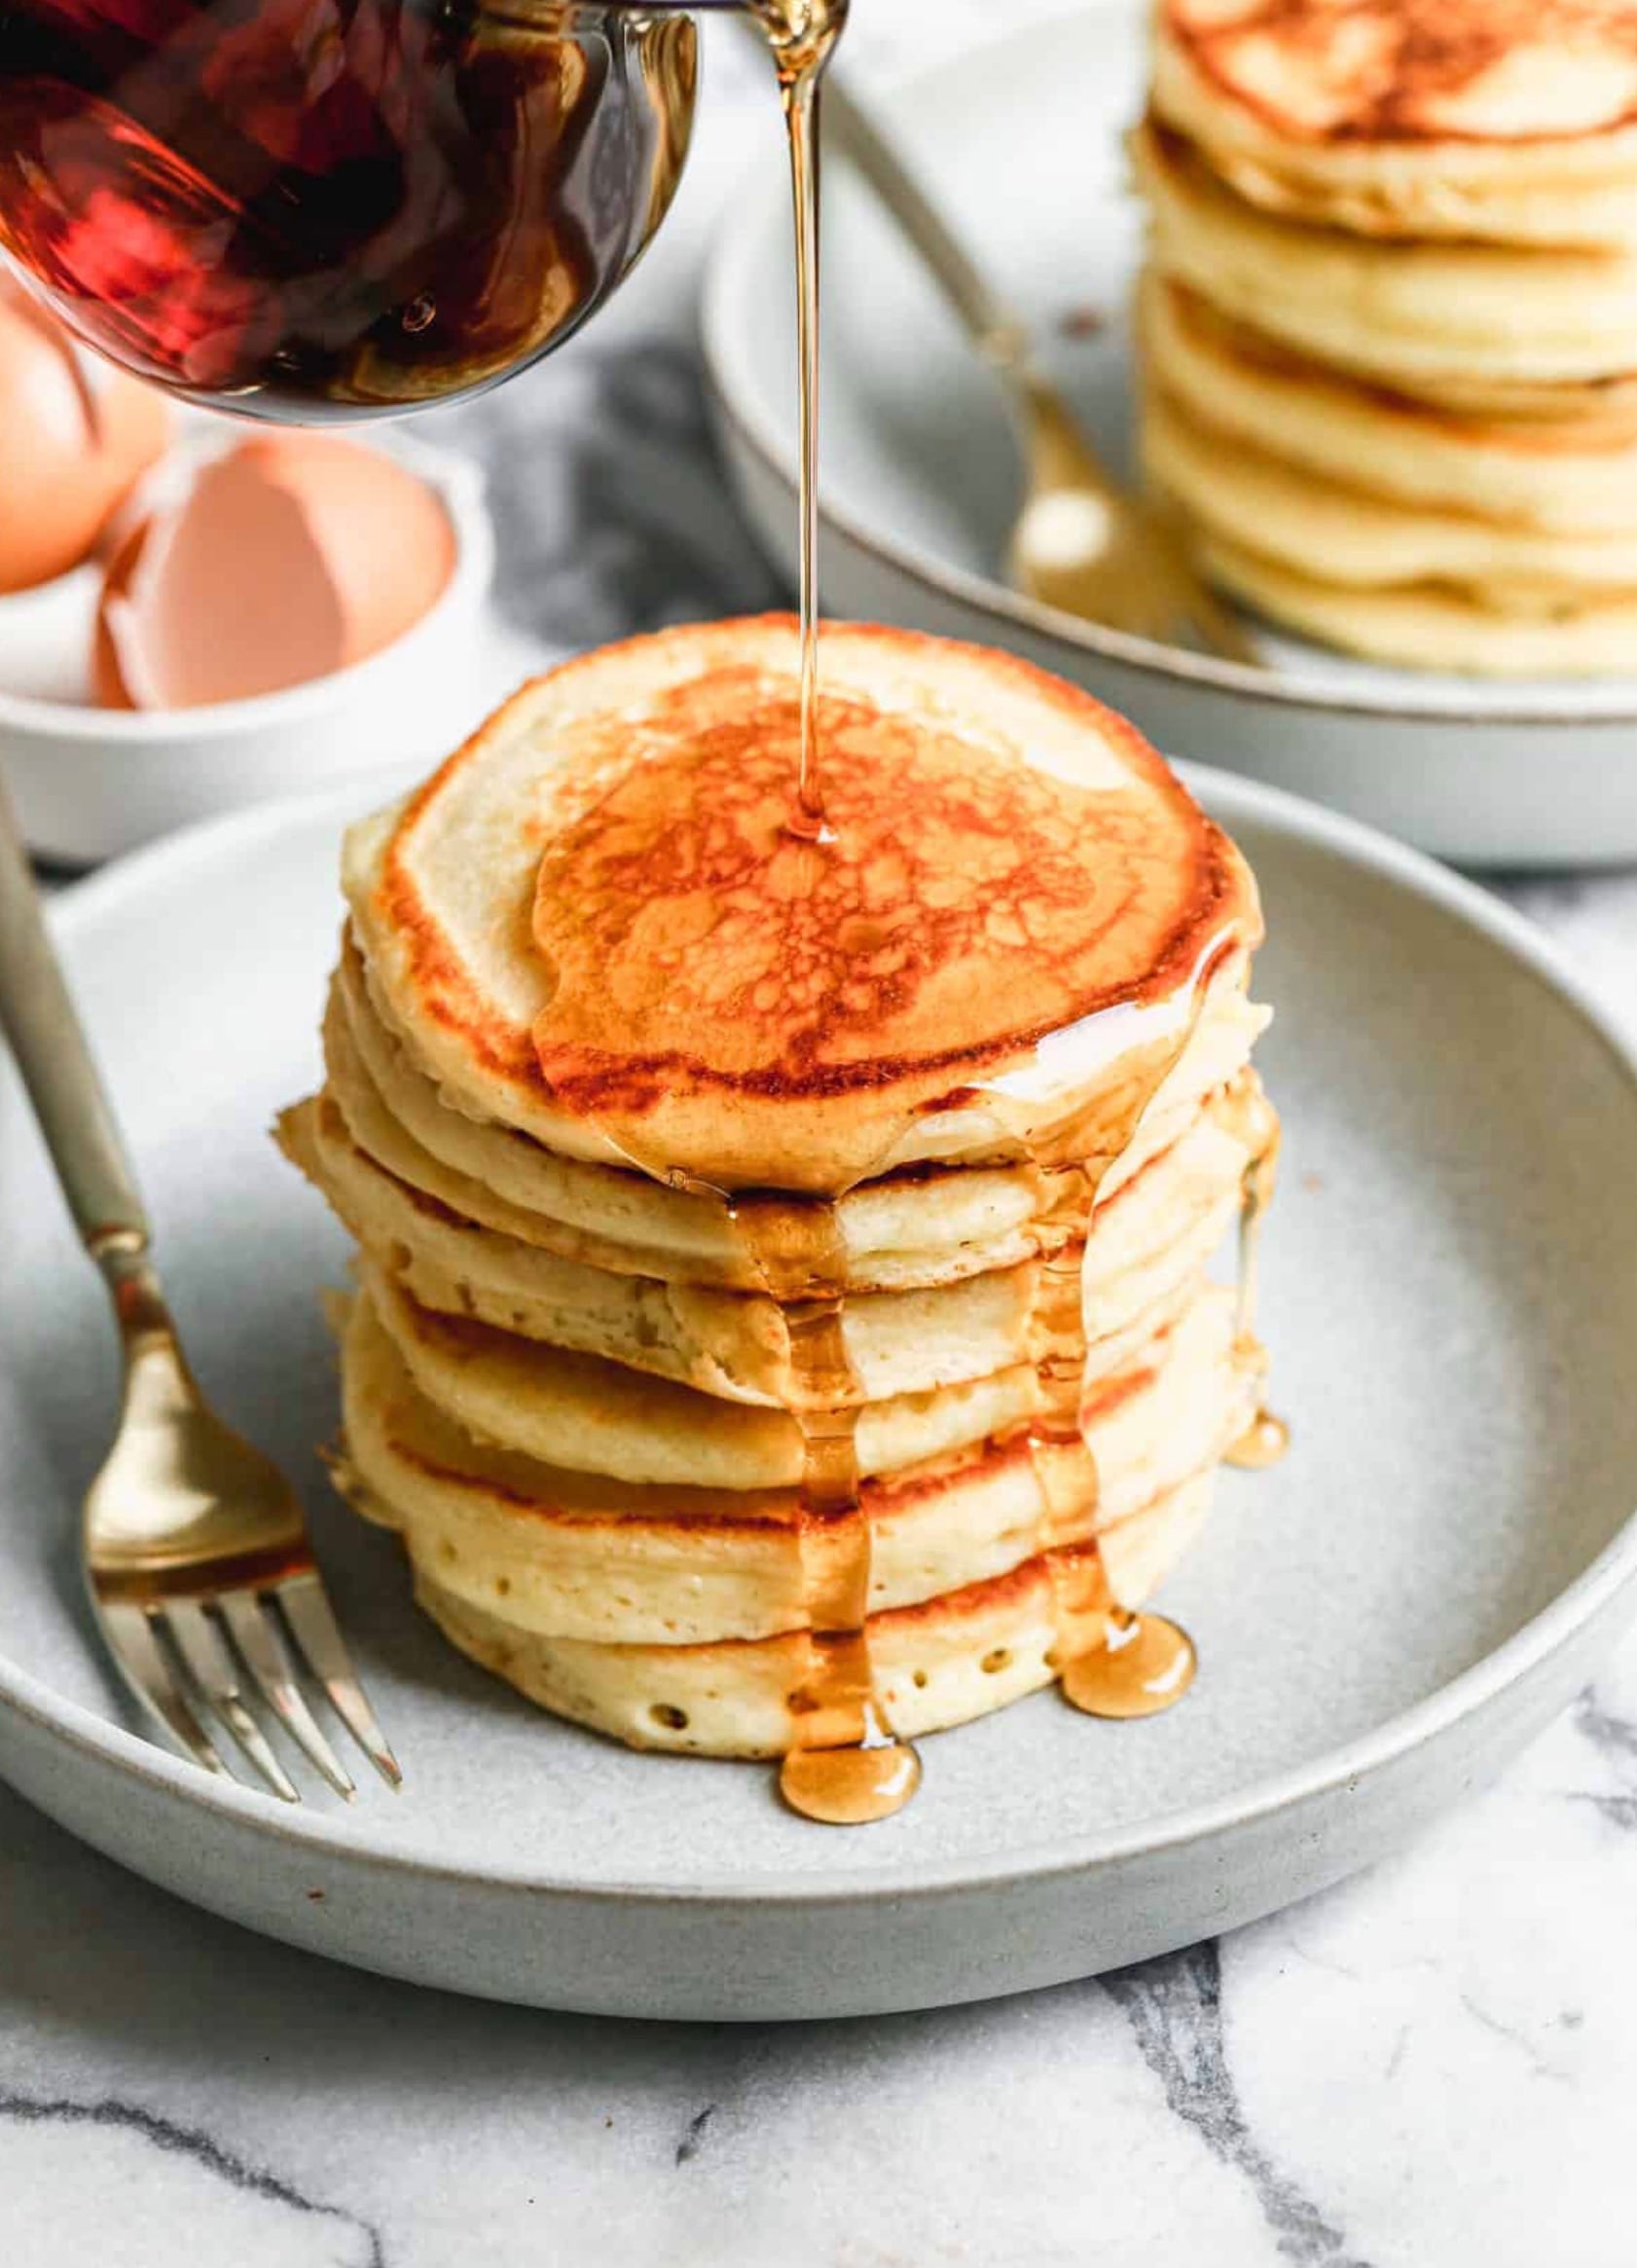
Classic buttermilk pancakes are a breakfast favorite. You can make these fluffy pancakes from scratch in just 20 minutes. The secret to light and tasty pancakes is using buttermilk and not overmixing the batter. This recipe makes 12 pancakes, perfect for feeding a family or guests.
You’ll need basic pantry items like flour, sugar, and baking powder. The buttermilk gives the pancakes a tangy flavor and helps them rise. For extra fun, try adding blueberries or chocolate chips before flipping. Serve your pancakes warm with syrup for a yummy start to your day.
Exact Ingredients List
Here’s what you need to make these yummy buttermilk pancakes:
- 2 cups all-purpose flour
- 2 tablespoons granulated sugar
- 1½ teaspoons baking powder
- ¾ teaspoon baking soda
- ½ teaspoon salt
- 2 cups buttermilk
- 2 large eggs, beaten
- 2 tablespoons melted butter
- 2 tablespoons milk (to thin batter)
For extra flavor, you can add:
- Blueberries or chocolate chips (optional)
You’ll also need a griddle or large skillet to cook your pancakes. Don’t forget butter or non-stick spray to grease the cooking surface!
This recipe makes about 12 pancakes. It’s perfect for a family breakfast or brunch. You can easily double the recipe if you’re cooking for a crowd.
Remember, fresh ingredients make the best pancakes. Check that your baking powder and baking soda aren’t expired for the fluffiest results!
Instructions

Heat your griddle to 350°F or a large skillet to medium. Grease it with butter or cooking spray.
Mix the dry stuff in a big bowl: flour, sugar, baking powder, baking soda, and salt.
Pour in the buttermilk, beaten eggs, and melted butter. Stir just until mixed – don’t overdo it! Add milk bit by bit until the batter is thick but pourable.
Use a 1/4 cup to scoop batter onto the hot griddle. If you want, sprinkle on some blueberries or chocolate chips.
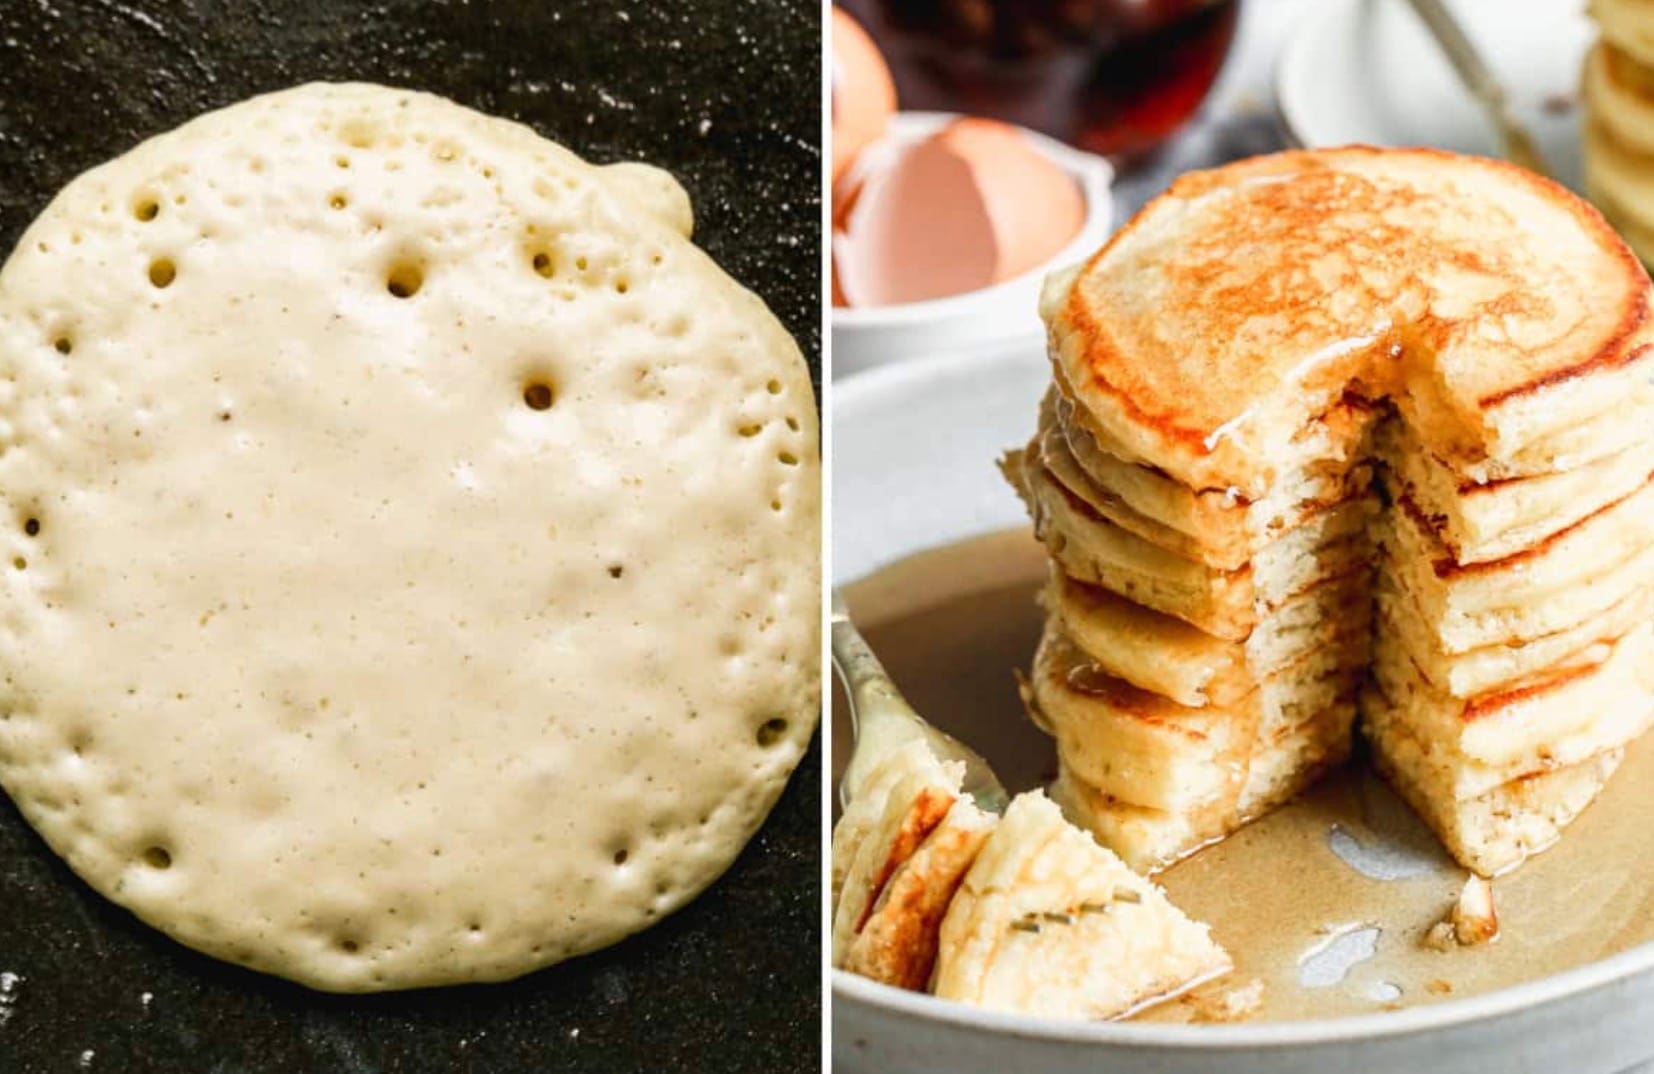
Cook until bubbles pop up on top, then flip once. They should be golden brown on both sides.
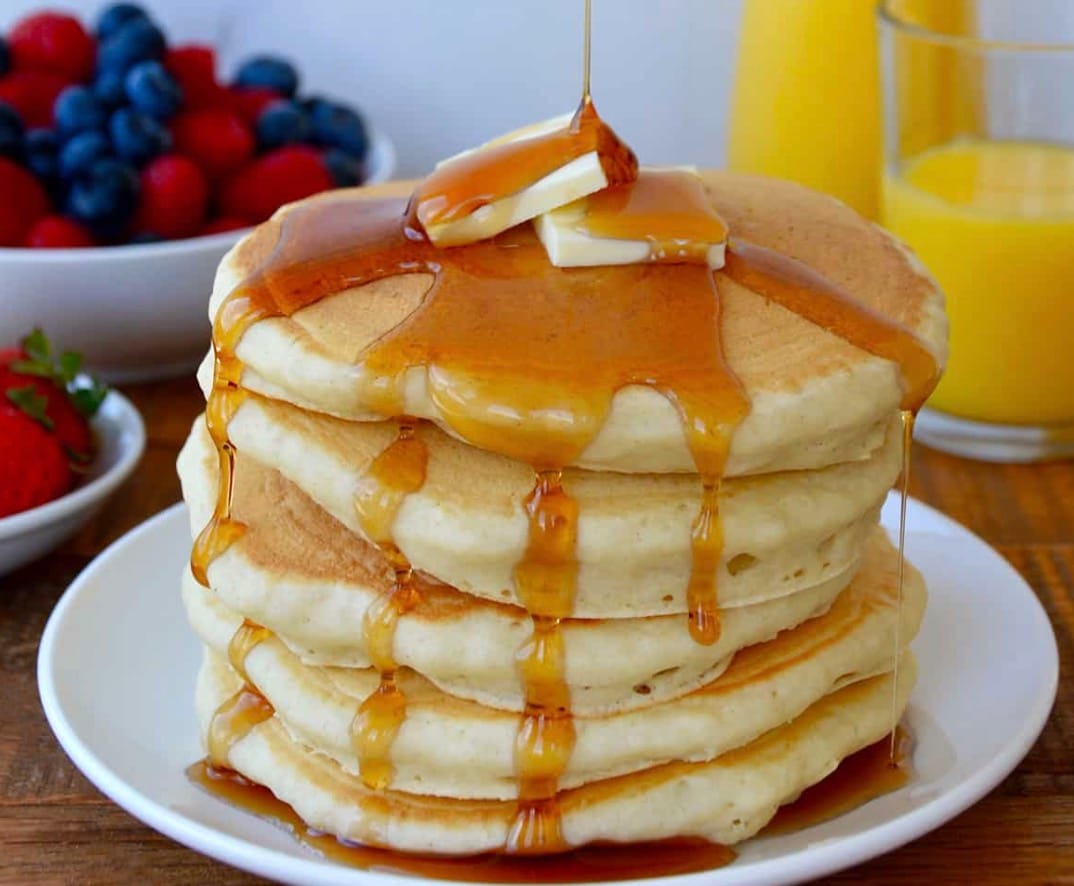
Serve your pancakes warm with syrup. Enjoy your yummy breakfast!
Possible Substitutes List
Don’t have buttermilk on hand? No worries! You can easily make your own substitute at home. Here are some quick options:
Milk + Lemon Juice: Mix 1 cup milk with 1 tablespoon lemon juice. Let it sit for 5 minutes.
Milk + Vinegar: Combine 1 cup milk with 1 tablespoon white vinegar. Wait 5 minutes.
Yogurt + Milk: Whisk 3/4 cup plain yogurt with 1/4 cup milk until smooth.
Sour Cream + Milk: Blend 3/4 cup sour cream with 1/4 cup milk.
Kefir: Use an equal amount of kefir in place of buttermilk.
These substitutes will give your pancakes a similar tangy flavor and fluffy texture. Remember to use the same amount as the buttermilk called for in the recipe.
For best results, let your substitute sit at room temperature for about 10 minutes before using. This allows the flavors to blend and the mixture to thicken slightly.
Try these options next time you’re craving pancakes but find yourself out of buttermilk!
How To Make It Diabetes-Friendly
To make these pancakes more diabetes-friendly, you can make a few simple swaps. Replace the all-purpose flour with whole wheat flour or almond flour. This will lower the carb count and add more fiber.
Instead of sugar, use a natural sweetener like stevia or monk fruit. These options won’t spike your blood sugar.
For the milk and buttermilk, choose low-fat or unsweetened almond milk. This cuts down on calories and carbs.
Skip the chocolate chips and opt for fresh berries instead. Blueberries or strawberries add natural sweetness without extra sugar.
When cooking, use a non-stick spray instead of butter to reduce fat. Make smaller pancakes using just 2 tablespoons of batter per pancake. This helps with portion control.
Top your pancakes with a dollop of Greek yogurt and a sprinkle of cinnamon. Avoid syrup, which is high in sugar. If you want extra sweetness, try a small drizzle of sugar-free maple syrup.
Remember to check your blood sugar before and after eating to see how these pancakes affect you. Everyone’s body reacts differently to foods.
Tips, Tricks & Storing
Don’t overmix the batter! A few lumps are okay. Overmixing can make your pancakes tough.
Let the batter rest for 5-10 minutes before cooking. This helps the flour absorb the liquid and makes fluffier pancakes.
For even cooking, use a 1/4 cup measure to pour batter onto the griddle. This keeps your pancakes uniform in size.
Watch for bubbles on the surface of the pancake. When they start to pop, it’s time to flip!
Keep your pancakes warm by placing them on a baking sheet in a 200°F oven while you finish cooking the rest.
To store leftovers, let pancakes cool completely. Place wax paper between each pancake and store in an airtight container in the fridge for up to 3 days.
You can freeze pancakes too! Wrap them individually in plastic wrap, then place in a freezer bag. They’ll keep for up to 2 months.
To reheat, pop frozen pancakes in the toaster or microwave for a quick breakfast.
Try adding fun mix-ins like chocolate chips, blueberries, or chopped nuts to the batter for variety.
Serve with butter, maple syrup, fresh fruit, or whipped cream for a delicious breakfast treat!